Astro を Codespaces で構築する
概要
静的サイトジェネレーター( SSG: Static Site Generator )として人気急上昇中の Astro 。開発環境を GitHub Codespaces に構築してみます。
解説動画
www.youtube.com
この記事の目次
GitHub リポジトリ作成
わかりやすい名前で、GitHub にリポジトリを作成します。今回は、とりあえず astro という名前でリポジトリを作成しました。Add a README file や Add .gitignore については、必要であれば、適宜追加してください。(今回は、Add .gitignore のプルダウンのところで、Node を指定し、.gitignore を追加しておきました。一応、README も追加しておきました。)
Codespace 作成
作成した GitHub リポジトリの <>Code▼ ボタンをクリックします。Codespaces のタブにある Create codespace on main ボタンをクリックします。
Astro インストール
まずはバージョンを確認してみます。
$ node -v
v19.7.0
では、Astro のインストールです。
$ npm create astro@latest
このブログを執筆している時点でインストールされる最新バージョンは、2.1.3 となります。表示される質問に答えていけば、簡単にインストールが完了します。今回は、ディレクトを「 tutrial 」。依存関係をすべてインストールし、TypeScript を使用することにしました。
Need to install the following packages:
  create-astro@3.1.0
Ok to proceed? (y)

╭─────╮  Houston:
│ ◠ ◡ ◠  Let's build something great!
╰─────╯

 astro   v2.1.3 Launch sequence initiated.

   dir   Where should we create your new project?
         ./tutrial

  tmpl   How would you like to start your new project?
         Include sample files
      ✔  Template copied

  deps   Install dependencies?
         Yes
      ✔  Dependencies installed

    ts   Do you plan to write TypeScript?
         Yes

   use   How strict should TypeScript be?
         Strict
      ✔  TypeScript customized

   git   Initialize a new git repository?
         Yes
      ✔  Git initialized

  next   Liftoff confirmed. Explore your project!

         Enter your project directory using cd ./tutrial
         Run npm run dev to start the dev server. CTRL+C to stop.
         Add frameworks like react or tailwind using astro add.

         Stuck? Join us at https://astro.build/chat

╭─────╮  Houston:
│ ◠ ◡ ◠  Good luck out there, astronaut! 🚀
╰─────╯
表示してみる
tutrial ディレクトリに移動し、npm run dev で表示してみます。host オプションで 0.0.0.0 を指定してください。オプションを設定しないと Nginx がエラーをはきます。
参考サイト github.com
$ cd tutrial
$ npm run dev -- --host 0.0.0.0
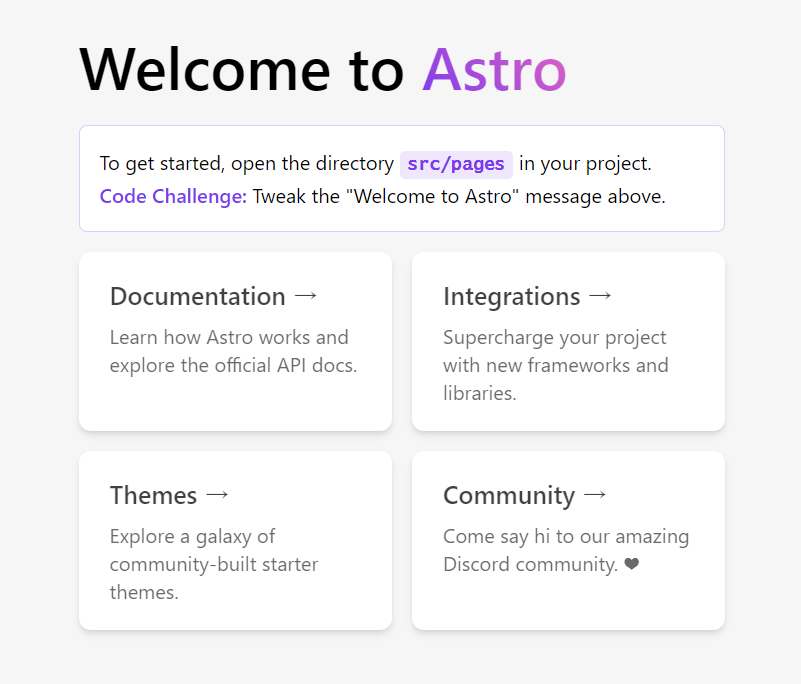
以下のような表示が出てくれば OK です。
OpenAI API を GitHub Codespaces の Node.js から呼び出してみる
概要
[ChatGPT] Open AI API を Node.js x TypeScript で試してみたという面白そうな記事が、DevelopersIO にアップされていました。今回は、これにアレンジを加えて試してみます。
具体的には、セットアップやコーディングの作業をローカルマシンではなく、GitHub Codespaces で行います。
また、OpenAI API キーを GitHub に晒すのが嫌なので、外部から読み込みできない Codespaces の secret に環境変数として置いて、js で読み込めるようにしてみます。
解説動画
www.youtube.com
この記事の目次
- 概要
- 解説動画
- この記事の目次
- GitHub リポジトリ作成
- codespace 作成
- Node.js と Typescript 設定
- package.json 変更
- OpenAI API Key 作成
- GitHub Secret 作成
- openai モジュール追加
- index.ts 作成
- 実行
GitHub リポジトリ作成
わかりやすい名前で、GitHub にリポジトリを作成します。今回は、とりあえず openai_api_node という名前でリポジトリを作成しました。Add a README file や Add .gitignore については、必要であれば、適宜追加してください。(今回は、Add .gitignore のプルダウンのところで、Node を指定し、.gitignore を追加しておきました。一応、README も追加しておきました。)
codespace 作成
作成した GitHub リポジトリの <>Code▼ ボタンをクリックします。Codespaces のタブにある Create codespace on main ボタンをクリックします。
オプションを使用した詳細設定については、リポジトリの codespace を作成する が参考になります。
Node.js と Typescript 設定
まずはバージョンを確認してみます。
$ node -v
v19.7.0
次に package.json を作成、Typescript 導入、自動コンパイル設定などを行います。
詳細設定については、Node.js & TypeScriptのプロジェクト作成 が参考になります。
$ npm init -y
$ npm install typescript @types/node ts-node nodemon --save-dev
$ npx tsc --init --rootDir src --outDir lib --esModuleInterop --resolveJsonModule --lib es6,dom --module commonjs
package.json 変更
package.json の scripts を以下に変更します。
"scripts": {
"start": "npm run build:live",
"build": "tsc -p .",
"build:live": "nodemon --watch 'src/**/*.ts' --exec \"ts-node\" src/index.ts"
},
OpenAI API Key 作成
OpenAI のアカウントにログイン後、以下の URLにアクセスして API Key を作成します。
できたキーをコピーして、どこかに保存しておいてください。次の GitHub Secret 作成で使用します。
GitHub Secret 作成
作成したリポジトリで、
Settings > Secrets and variables > Codespaces
と進んでいき New repository secret というボタンをクリックして、secret を作成します。
名前は適当なもので結構です。先ほど、コピーしておいた OpenAI API Key を該当箇所にペーストしたら secret の準備は OK です。
openai モジュール追加
Node.js に openai モジュールを追加します。
$ npm install openai
index.ts 作成
まず、src ディレクトリを作成し、その配下に index.ts を作成します。
import { Configuration, OpenAIApi } from "openai";

const configuration = new Configuration({
    apiKey: process.env.OPENAI_API_KEY,
});
const openai = new OpenAIApi(configuration);

export async function ask(content: string, model = "gpt-3.5-turbo-0301") {
  const response = await openai.createChatCompletion({
    model: model,
    messages: [{ role: "user", content: content }],
  });

  const answer = response.data.choices[0].message?.content;
  console.log(answer);
}

const question = "wowakaさんについて教えてください";
ask(question);
実行
$ npm start
結果がかえってきて成功ですが、内容的には不正確なものでした。こういった面もあるのが、OpenAI だということを認識できてよかったと思います。

MUI 公式 Example の改造 その 4 -- JEST & React Testing Library
概要
MUI 公式 Example の中から Next.js (TypeScript version) を雛形とし、自分の作りたいサイトに改造する 4 回目です。 今回は、JEST と React Testing Library をインストールし、最後のほうで簡単なテストのサンプルを使って練習をしてみます。
Rails を使っていた頃は、少しはテストをしていたのですが、なんか面倒で積極的にやりたい気が起きませんでした。 テストに対する苦手意識を克服するためにも、なんとか頑張ってみたいと思います。
数回に分けて連載する MUI に関連する記事の全体像
- その 1 -- anyenv インストール
- その 2 -- Node.js インストール
- その 3 -- nextjs-with-typescript 導入
- その 4 -- JEST & React Testing Library ← 今ココ
この記事の目次
- 概要
- 数回に分けて連載する MUI に関連する記事の全体像
- この記事の目次
- ホスト
- package.json
- インストール
- jest.config.js
- jest.setup.js
- tests ディレクトリ作成
- practice ディレクトリ作成
- テスト例 1 ( CommonJs )
- テスト例 2 ( ES6 無名関数 )
- テスト例 3( ES6 アロー関数 )
- テスト例 4
- テスト例 5
- テスト例 6
ホスト
Mac
メモリ: 16 GB
ストレージ: SSD 512 GB
package.json
参考サイト
この頃流行りのJestを導入して軽快にJSをテストしよう - Qiita
% vim package.json
以下を追加
"scripts": {
  "test": "jest",
  "test:ci": "jest --ci"
},


"devDependencies": {
  "@testing-library/jest-dom": "5.14.1",
  "@testing-library/react": "12.0.0",
  "@testing-library/user-event": "13.2.1",
  "@types/node": "^17.0.0",
  "babel-jest": "27.0.6",
  "eslint-plugin-testing-library": "4.11.0",
  "jest": "27.3.1",
  "react-test-renderer": "17.0.2"
}
インストール
% npm install
jest.config.js
参考サイト
next.js/jest.config.js at canary · vercel/next.js · GitHub
設定
基本的に Vercel の上記公式サイトのものを使用していますが、"testEnvironment": "jsdom", の部分だけ追加しました。デフォルトは、node なのですが、テストによってはエラーが出るので、jsdom にしております。詳細については、以下のサイトが参考になりました。
Jestの「 The error below may be caused by using the wrong test environment」の解決方法 - Qiita
% vim jest.config.js
const nextJest = require('next/jest')

const createJestConfig = nextJest({
  // Provide the path to your Next.js app to load next.config.js and .env files in your test environment
  dir: './',
})

// Add any custom config to be passed to Jest
const customJestConfig = {
  setupFilesAfterEnv: ['<rootDir>/jest.setup.js'],
  moduleNameMapper: {
    // Handle module aliases (this will be automatically configured for you soon)
    '^@/components/(.*)$': '<rootDir>/components/$1',
  },
  "testEnvironment": "jsdom",
}

// createJestConfig is exported this way to ensure that next/jest can load the Next.js config which is async
module.exports = createJestConfig(customJestConfig)
jest.setup.js
参考サイト
next.js/jest.setup.js at canary · vercel/next.js · GitHub
設定
Vercel のものを、そのまんま使いました。
% vim jest.setup.js
// Optional: configure or set up a testing framework before each test.
// If you delete this file, remove `setupFilesAfterEnv` from `jest.config.js`

// Used for __tests__/testing-library.js
// Learn more: https://github.com/testing-library/jest-dom
import '@testing-library/jest-dom/extend-expect'
tests ディレクトリ作成
% pwd
/Users/ユーザー/React/school-test
% mkdir __tests__
practice ディレクトリ作成
練習用のファイルをひとまとめに保管するためのディレクトリを準備しました。
% pwd
/Users/ユーザー/React/school-test/src/pages
% mkdir __practice__
テスト例 1 ( CommonJs )
まずは、CommonJs を使った場合のテストを練習してみます。実際のプログラムで、CommonJs を使うことは、今後、あまりないとは思いますが、ES6 との違いがわかるので、やってみて損はないのではないでしょうか。
参考サイト
commonjs_sum.js
% vim /Users/ユーザー/React/school-test/src/pages/__practice__/commonjs_sum.js
# CommonJs
function sum(a, b) {
  return a + b;
}
module.exports = sum;
commonjs_sum.test.js
vim /Users/ユーザー/React/school-test/__tests__/commonjs_sum.test.js
const sum = require('../src/pages/__practice__/commonjs_sum');

test('adds 1 + 2 to equal 3', () => {
  expect(sum(1, 2)).toBe(3);
});
実行
% npm test commonjs_sum.test.js
実行結果
> nextjs-with-typescript@5.0.0 test
> jest "commonjs_sum.test.js"

 PASS  __tests__/commonjs_sum.test.js
  ✓ adds 1 + 2 to equal 3 (3 ms)

Test Suites: 1 passed, 1 total
Tests:       1 passed, 1 total
Snapshots:   0 total
Time:        1.671 s
Ran all test suites matching /commonjs_sum.test.js/i.
テスト例 2 ( ES6 無名関数 )
次は、TypeScript です。ES6 の無名関数の場合のテストを練習してみます。プログラムの中身が、無名関数であろうが、アロー関数であろうが、テストの書き方は同じで大丈夫です。
参考サイト
noname_sum.ts
% vim /Users/ユーザー/React/school-test/src/pages/__practice__/noname_sum.ts
// ES6 無名関数
const sum = function(a:number, b:number):number {
  return a + b;
}

export default sum
noname_sum.test.ts
vim /Users/ユーザー/React/school-test/__tests__/noname_sum.test.ts
import sum from '../src/pages/__practice__/noname_sum'

test('adds 1 + 2 to equal 3', () => {
  expect(sum(1, 2)).toBe(3)
})
実行
% npm test noname_sum.test.ts
実行結果
> nextjs-with-typescript@5.0.0 test
> jest "noname_sum.test.ts"

 PASS  __tests__/noname_sum.test.ts (6.735 s)
  ✓ adds 1 + 2 to equal 3 (3 ms)

Test Suites: 1 passed, 1 total
Tests:       1 passed, 1 total
Snapshots:   0 total
Time:        6.892 s
Ran all test suites matching /noname_sum.test.ts/i.
テスト例 3( ES6 アロー関数 )
次は、ES6 のアロー関数の場合です。テストの書き方は、上記の無名関数のときと全く同じです。あたりまえといえば、あたりまえですが。
参考サイト
FN1609010 | TypeScript入門 09: アロー関数式 | HTML5 : テクニカルノート
arrow_sum.ts
% vim /Users/ユーザー/React/school-test/src/pages/__practice__/arrow_sum.ts
// ES6 アロー関数
const sum = (a:number, b:number) => a + b;

export default sum
arrow_sum.test.ts
vim /Users/ユーザー/React/school-test/__tests__/arrow_sum.test.ts
import sum from '../src/pages/__practice__/arrow_sum'

test('adds 1 + 2 to equal 3', () => {
  expect(sum(1, 2)).toBe(3)
})
実行
% npm test arrow_sum.test.ts
実行結果
> nextjs-with-typescript@5.0.0 test
> jest "arrow_sum.test.ts"

 PASS  __tests__/arrow_sum.test.ts (6.404 s)
  ✓ adds 1 + 2 to equal 3 (3 ms)

Test Suites: 1 passed, 1 total
Tests:       1 passed, 1 total
Snapshots:   0 total
Time:        6.566 s
Ran all test suites matching /arrow_sum.test.ts/i.
テスト例 4
スプレッド構文や reduce を使っているサンプル。自分用のメモとして、ここに上げておきます。
参考サイト
Jest - TypeScript Deep Dive 日本語版
【JavaScript】”…”ドットが3つ…?これ、どうやって使うの?スプレッド構文の挙動と活用方法|ProgLearn|エンジニアのためのプログラミング情報メディア
foo.ts
% vim /Users/ユーザー/React/school-test/src/pages/__practice__/foo.ts
export const sum
  = (...a: number[]) =>
    a.reduce((acc, val) => acc + val, 0);
foo.test.ts
vim /Users/ユーザー/React/school-test/__tests__/foo.test.ts
import { sum } from '../src/pages/__practice__/foo';

test('basic', () => {
  expect(sum()).toBe(0);
});

test('basic again', () => {
  expect(sum(1, 2)).toBe(3);
});
実行
% npm test foo.test.ts
実行結果
> nextjs-with-typescript@5.0.0 test
> jest "foo.test.ts"

 PASS  __tests__/foo.test.ts (6.44 s)
  ✓ basic (3 ms)
  ✓ basic again

Test Suites: 1 passed, 1 total
Tests:       2 passed, 2 total
Snapshots:   0 total
Time:        6.59 s
Ran all test suites matching /foo.test.ts/i.
テスト例 5
String を使ったサンプル。自分用のメモとして。
参考サイト
TypeScript のテストを Jest (ts-jest) でやってみる - Qiita
greet.ts
% vim /Users/ユーザー/React/school-test/src/pages/__practice__/greet.ts
export default (name: string): string => `Hello, ${name}!`;
greet.test.ts
vim /Users/ユーザー/React/school-test/__tests__/greet.test.ts
import greet from '../src/pages/__practice__/greet'

describe('greet', (): void => {
  test('should say hello to Tom.', (): void => {
    const response: string = greet('Tom');
    expect(response).toBe('Hello, Tom!');
  });
})
実行
% npm test greet.test.ts
実行結果
> nextjs-with-typescript@5.0.0 test
> jest "greet.test.ts"

 PASS  __tests__/greet.test.ts (6.407 s)
  greet
    ✓ should say hello to Tom. (2 ms)

Test Suites: 1 passed, 1 total
Tests:       1 passed, 1 total
Snapshots:   0 total
Time:        6.554 s
Ran all test suites matching /greet.test.ts/i.
テスト例 6
参考サイト
React Testing Libraryの使い方 - Qiita
App.js
% vim /Users/ユーザー/React/school-test/src/pages/__practice__/App.js
import React from 'react';

const title = 'Hello React';

function App() {
  return <div>{title}</div>;
}

export default App;
App.test.js
vim /Users/ユーザー/React/school-test/__tests__/App.test.js
import React from 'react';
import { render, screen } from '@testing-library/react';

import App from '../src/pages/__practice__/App';

describe('App', () => {
  test('renders App component', () => {
    render(<App />);

    screen.debug();
  });
});
実行
% npm test App.test.js
実行結果
> nextjs-with-typescript@5.0.0 test
> jest "App.test.js"

"next/jest" is currently experimental. https://nextjs.org/docs/messages/experimental-jest-transformer
  console.log
    <body>
      <div>
        <div>
          Hello React
        </div>
      </div>
    </body>

    /Users/ユーザー/React/school-test/__tests__/App.test.js:15:24
      13 |

      at logDOM (node_modules/@testing-library/dom/dist/pretty-dom.js:89:13)

 PASS  __tests__/App.test.js
  App
    ✓ renders App component (80 ms)

Test Suites: 1 passed, 1 total
Tests:       1 passed, 1 total
Snapshots:   0 total
Time:        2.142 s, estimated 3 s
Ran all test suites matching /App.test.js/i.
まだまだ練習したりないので、続きは後日。